LivingLinda.com
  • Blog
  • About
    • Disclosure
    • Privacy Policy
  • Travel
    • Africa
    • Asia
    • Caribbean
    • Cruising
    • Europe
    • Latin America >
      • Costa Rica
    • North America >
      • Canada
      • United States >
        • Arizona
        • California
        • Colorado
        • Florida
        • Georgia
        • Hawaii
        • Maryland
        • Montana
        • National Parks & Monuments
        • Nevada
        • New Mexico
        • Virginia
        • Washington
        • Washington DC
  • Moving to/Living in Portugal
  • Caturday
    • Caturday 2025
    • Caturday 2024
    • Caturday 2023
    • Caturday 2022
  • Pet/House Sitting
  • Recipes
  • Shop
    • Art Gallery
    • Photography
    • Christmas Cards
    • Coloring Club Yearly Membership
    • Massage Therapy
    • Books >
      • Coloring Books
      • Cookbooks
      • National Pancake Day Sale
      • Massage >
        • Prosperous Massage Practice
  • Contact

Experiencing the Brighton i360: A Vertical Pier of Panoramic Views

8/30/2023

0 Comments

 
Visiting the Brighton i360 gives you the chance to see the stunning coastal and city views from a totally new perspective.​
Picture
**This post may contain affiliate links. I receive a small amount of compensation when you purchase from my links which help to keep this blog running.**
The Brighton i360 is a modern architectural marvel and an iconic attraction that offers visitors a unique perspective of Brighton and its stunning coastline. Often referred to as a "vertical pier," the i360 provides an elevated experience that's both breathtaking and informative.

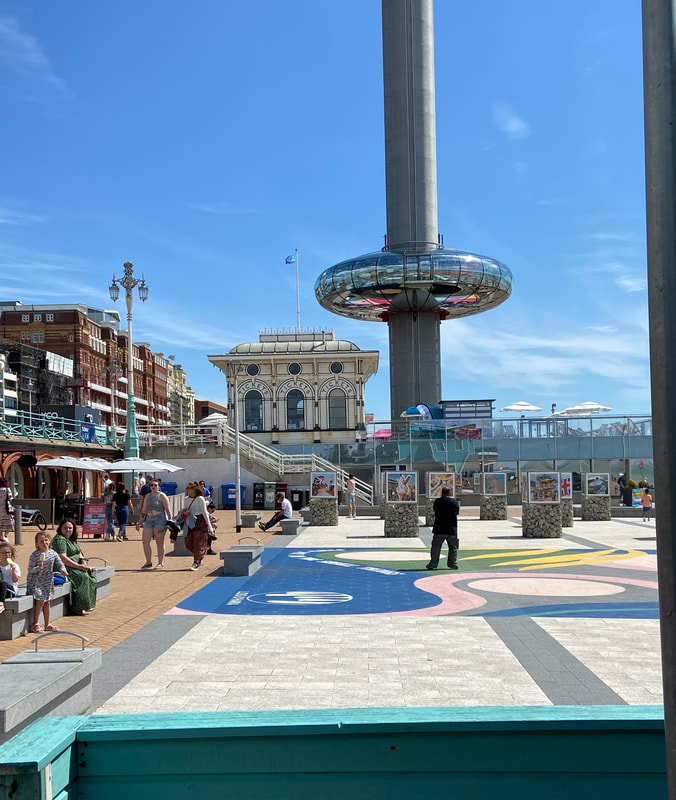
The Brighton i360 is a futuristic observation tower located on the city's seafront with a bird's eye view of the remains of the West Pier. It was designed by the same architects who created the London Eye. The tower stands at 162 meters (531 feet) tall, making it the tallest observation tower in the UK outside of London. The tower opened on August 4th 2016. ​

The main attraction of the i360 is its spacious, circular viewing platform that gradually glides up the tower. As you ascend, you're treated to panoramic views of Brighton, the surrounding coastline, and the English Channel.
Picture
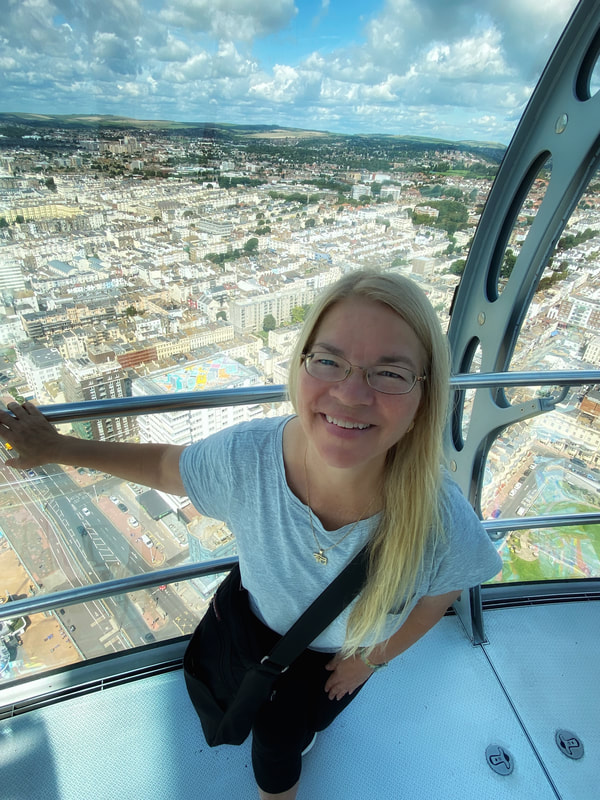
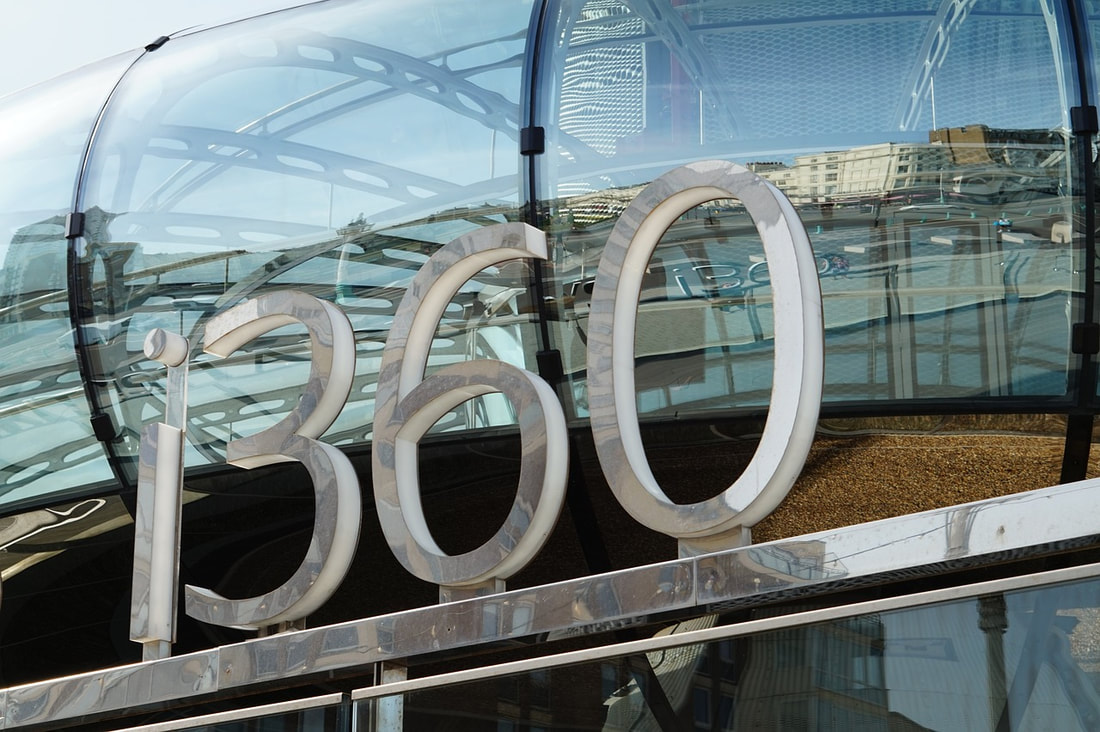
The i360's unique design is characterized by a futuristic, glass-enclosed pod that offers unobstructed vistas. The tower itself is slender and sleek, creating an elegant addition to Brighton's skyline.​
Picture
Inside the pod, you'll find interactive screens that provide information about the landmarks and points of interest you're observing.

The entire experience, including the ride up and down, typically lasts around 20 to 25 minutes.
Picture
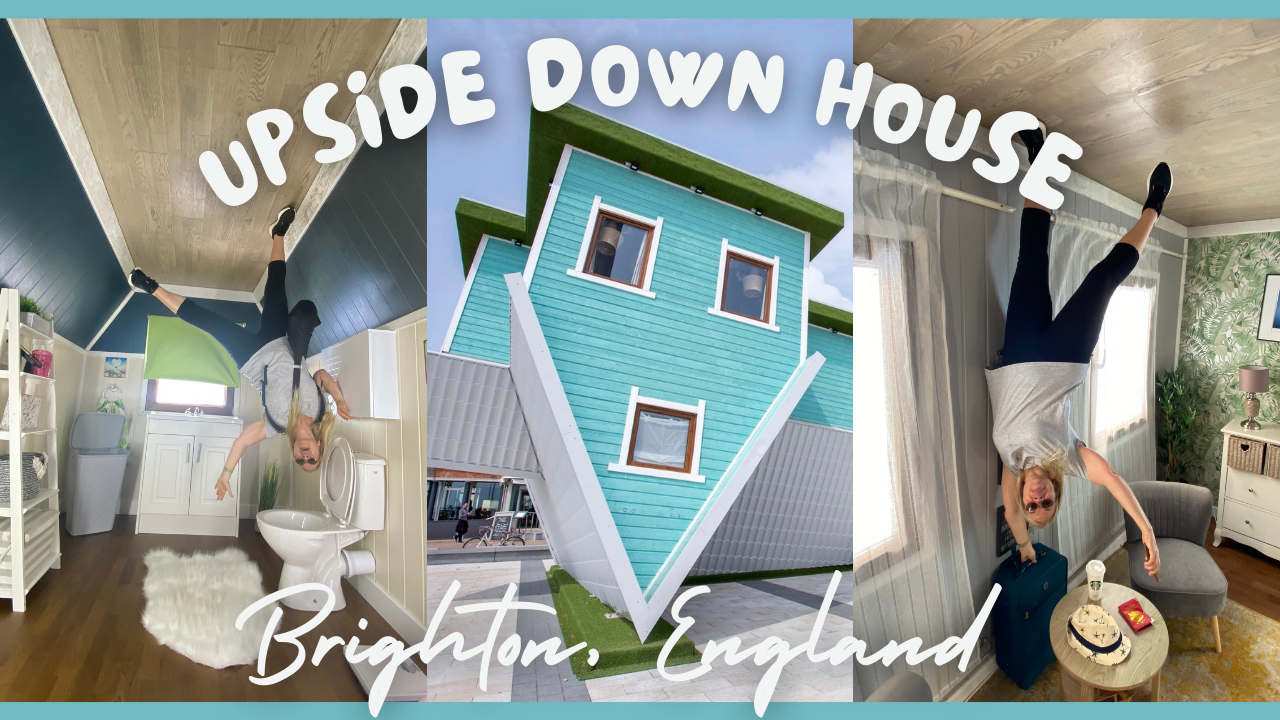
​After your i360 experience, take a leisurely stroll along the Brighton Beach promenade to fully soak in the coastal ambiance or visit the Upside Down House which is located right next for a playful experience that may just have you questioning gravity and what is real and what is illusion.
Picture
Inside the Upside Down House
Practical Information:

Tickets: Tickets for the Brighton i360 can be purchased online in advance or on-site. It's recommended to book ahead, especially during peak tourist seasons.

Operating Hours: The i360's operating hours can vary depending on the season, so it's advisable to check the official website for the most up-to-date information.

Accessibility: The i360 is designed to be accessible to all visitors, including those with mobility challenges.

Weather: The viewing experience is enjoyable in various weather conditions, as the pod is climate-controlled and provides shelter from the elements.

Photography: Photography is encouraged, so don't forget your camera or smartphone to capture the breathtaking views.

In addition to the views, the i360 also offers a variety of activities, including:

  • The base of the i360 features a beachfront building that includes a restaurant and event space, making it a versatile venue for various occasions.
  • A gift shop

Tips for Visiting:
Timing: Consider visiting during the late afternoon or early evening to enjoy both daytime and sunset views.
Combined Experiences: Some ticket options might include discounts for other attractions in Brighton, so look for package deals if you plan to explore more of the city.
Check for Events: The i360 occasionally hosts special events, such as yoga sessions, live music, and more. Keep an eye out for any events that might align with your visit.
0 Comments

Individual Keto Breakfast Tart Crusts

8/28/2023

0 Comments

 
These Keto Breakfast Tart Crusts are a delicious and make the perfect vessel for yogurts, fruits or whatever you want to put in them.
Picture
**This post may contain affiliate links. I receive a small amount of compensation when you purchase from my links which help to keep this blog running.**
Individual Keto Breakfast Tart Crusts
Yields 4 tarts

Prep Time 5 minutes
Cook Time 10-15 minutes

Ingredients:
2 1/2 cup Almond Flour
1/2 cup shredded coconut
​1/4 cup gluten free oats
1 Tablespoon Chia seeds
2 teaspoons hemp seeds
1/3 cup Keto sweetener of choice 
1/4 teaspoon Sea salt 
1/4 cup Ghee (measured solid, then melted)
1 large Egg 
1/2 teaspoon Vanilla extract (optional)
¼ teaspoon cinnamon
Directions: Preheat the oven to 350°F (180°C). Grease 4 mini tart pans.

In a large bowl, mix together the seven ingredients. Stir in the melted ghee and egg, until well combined. (If using vanilla, stir that into the melted ghee before adding to the dry ingredients.)

The "dough" will be dry and crumbly. Just keep mixing, pressing and stirring, until it's uniform. (Alternatively, you can use a food processor to mix everything together.)


Divide the granola crust evenly between the four prepared tart pans and use a flat-bottomed measuring cup or glass to press the crust evenly along the bottom and up the sides of the pans.

Place on a baking sheet and bake for 10-15 minutes, or until firm to the touch and browned.
Carefully poke holes in the surface using a fork to prevent bubbling.

Let cool completely.
Here's how I served them.
Picture
Picture
Picture
Recommended Posts
Picture
Picture
Picture
0 Comments

No Bake Low Carb Lemon Strawberry Cheesecake Treats

8/24/2023

0 Comments

 
This no bake, low carb lemon strawberry cheesecake treat is easy-peasy to make and the bright lemon goes perfectly with plump, fresh strawberries.  Make the perfect afternoon snack or dessert.
Picture
**This post may contain affiliate links. I receive a small amount of compensation when you purchase from my links which help to keep this blog running.**
No Bake Low Carb Lemon Strawberry Cheesecake Treats
Prep Time 15 minutes
Total Time 15 minutes
Servings 4


Ingredients:
4 oz. cream cheese, softened
3/4 cup heavy whipping cream
1/3 cup Monk fruit sweetener (or sweetener of your choice)
2 teaspoons lemon extract
zest of 1 lemon
large strawberries (2-4 depending on the size)
4 oz. mason jars 
Directions:
In a mixing bowl add the cream cheese, sweetener and whipping cream. Beat on high until smooth and creamy.
Add in lemon extract and mix well. If you would like more lemon flavor add a bit of the lemon zest as you won't need all of it.
Take 1 of the strawberries and chop into little pieces. With the other strawberry, slice into thin heart shaped pieces.
Fill each jar half way. 
Add the chopped strawberry to both jars to make a nice layer.
Top the strawberries with the rest of the cream cheese mixture.
Garnish top with sliced strawberries to make a flower pattern on top.
Sprinkle lemon zest in the middle of each flower. You don't have to use all the zest, just what looks nice.
Refrigerate until ready to eat.
Picture
Picture
0 Comments

Flowers of Kew Gardens

8/20/2023

0 Comments

 
Kew Gardens, located in Richmond, England, ranked number 2 in the Top 10 Gardens of the World.
Picture
**This post may contain affiliate links. I receive a small amount of compensation when you purchase from my links which help to keep this blog running.**
​In this video, I take you on a virtual tour of the stunning Kew Gardens flowers. Get ready to immerse yourself in a kaleidoscope of colors as we explore the breathtaking blooms that make Kew Gardens a floral paradise. From vibrant roses to delicate orchids, you'll discover the fascinating beauty of nature at its finest. 

Join me on this visual journey and let's indulge in the wonders of Kew Gardens together! 
Recommended Posts
Picture
0 Comments

No Yeast Baked Gluten Free Bagels

8/14/2023

0 Comments

 
In less than 45 minutes, you can have homemade bagels ready for cream cheese, lox, honey, nut butters, or whatever toppings your heart desires!
Picture
**This post may contain affiliate links. I receive a small amount of compensation when you purchase from my links which help to keep this blog running.**
​Even though they are simple to make, homemade bagels take a little while to prepare. The yeasted dough needs to rest for a long period of time, typically overnight. After that, it is poached in boiling water and cooked in the oven.

The yeast and poaching liquid are omitted from the recipe for these gluten free bagels. Simple self-rising flour and nonfat Greek yogurt are combined to make the bagel dough, which is then rolled into rolls, coated with egg wash and any other seasonings, and baked.
Ingredients:
1 1/2 cups gluten free self rising flour
1 cup plain Greek yogurt (make sure it is a yogurt that is thick to avoid stickiness of dough)
1 teaspoon salt
1 large egg (for egg wash)
1 teaspoon of liquid (water, milk, or cream depending on your preference)
everything bagel seasoning mix, sesame seeds, poppy seeds, parmesan cheese, cinnamon (all optional)

Directions:
​Preheat the oven to 375°F (180°C). Place parchment paper on a baking sheet.

In a large bowl, use a sturdy spatula to combine the self-rising flour, yogurt and salt.  

Dump the mixture onto a lightly floured work surface. Knead the dough* together by hand for about 5 minutes, until the dough is smooth and elastic. If your dough is sticky add more flour.

If you are going to make any of the bagels flavored, (i.e. cinnamon, onion, etc.) separate half of the dough and add the flavoring. For the cinnamon bagels, I used 1 teaspoon of cinnamon to make the 2 cinnamon bagels.  If you are adding toppings (parmesan cheese, everything but the bagel mix, etc.), they are added after egg wash. 

If you are going to make all one flavor, divide the dough into 8 equal parts.

Shape each portion of dough into a ball. Each dough part should be formed into a ball. Make a hole in the center of each ball with your thumbs. Stretch and pull the dough slowly until it forms a ring of the same size. Continue with the subsequent rounds. You may need to flour your hands. 

Arrange the shaped bagels on the prepared baking sheet. Mix together the egg wash by whisking the egg in a small bowl until smooth. Brush the egg wash mixture over the bagels. Sprinkle desired toppings over bagels.

Bake for 20 to 25 minutes, rotating the baking sheet midway through baking.

If you want the tops of the bagels more browned, increase oven temperature to 450°F. for an additional 3 to 4 minutes. (The bagels pictured were baked for 23 minutes).

Eat warm out of the oven with your favorite toppings.

*I usually have to split the dough in half to make it easier for me to knead with my small hands.  It also makes it easier if you are going to make different flavors.
Picture
This time, I made 4 Everything Bagels, 2 Cinnamon, 1 Poppy Seed and 1 Parmesan Cheese.
STORAGE TIPS
Place in tightly sealed container or a zip-lock bag for up to 24 hours on the counter. In the refrigerator, they'll keep for up to 3 days.

If you wish to freeze them, wrap each one separately and defrost them before slicing and toasting.  I usually pop them in the microwave for about 20 seconds.
Recommended Posts
Picture
0 Comments
<<Previous

    Linda Roisum

    Traveller, chief taste-tester and food finder and retired expat living in Lisbon, Portugal.

    Archives

    November 2025
    October 2025
    September 2025
    August 2025
    July 2025
    June 2025
    May 2025
    April 2025
    March 2025
    February 2025
    January 2025
    December 2024
    November 2024
    October 2024
    September 2024
    August 2024
    July 2024
    June 2024
    May 2024
    April 2024
    March 2024
    February 2024
    January 2024
    December 2023
    November 2023
    October 2023
    September 2023
    August 2023
    July 2023
    June 2023
    May 2023
    April 2023
    March 2023
    February 2023
    January 2023
    December 2022
    November 2022
    October 2022
    September 2022
    August 2022
    July 2022
    June 2022
    May 2022
    April 2022
    March 2022
    February 2022
    December 2021
    November 2021
    September 2021
    May 2021
    September 2020
    April 2020
    March 2020
    February 2020
    January 2020
    November 2019
    February 2019
    November 2018
    July 2018
    April 2018
    December 2017
    May 2017
    April 2017
    December 2016
    April 2016
    March 2016
    February 2016
    December 2015
    November 2015
    October 2015
    September 2015
    August 2015
    April 2015
    January 2015
    July 2014
    June 2014
    March 2014
    February 2013
    December 2012
    November 2012
    September 2012
    May 2012
    May 2011
    April 2011
    December 2010
    September 2010
    July 2010
    March 2010
    August 2009
    June 2008

    Categories

    All
    30 Minute Meals
    AirBnb Reviews
    Alaska
    Alicante
    Appetizer Recipes
    Aquariums
    Arizona
    Art
    Art Spotlight
    Austria
    Aveiro
    Barcelona
    Book Reviews
    Braga
    Breakfast Recipes
    Bright Line Eating
    Brighton
    Burgers
    Caldas Da Rainha
    California
    Canada
    Candy
    Caribbean
    Chocolate
    Christmas
    Coimbra
    Colorado
    Condiments
    Cookies
    Cooking For Two
    Costa Rica
    Cost Of Living
    Crock Pot Recipes
    Cruises
    D.C.
    Denali National Park
    Dessert Recipes
    Dips
    Dominica
    Dressings
    Drinks
    Dublin
    England
    Florida
    France
    Freebies
    Georgia
    Germany
    Gluten Free Dining
    Grand Cayman
    Hawaii
    Health
    Hiking
    Holidays
    Hong Kong
    Hysterectomy
    Interviews
    Ireland
    Italy
    Juices
    Keto Recipes
    Las Vegas
    Lisbon
    Living Abroad
    London
    Madeira Island
    Madrid
    Main Courses
    Mains
    Malaga
    Marrakech
    Maryland
    Menopause
    Monthly Recap
    Morocco
    Moving To Portugal
    MSC Orchestra
    Museums
    Naples
    National Parks
    Nevada
    New Mexico
    Night Sweats
    North Carolina
    Ocean City
    One Pot Meals
    Paris
    Pies
    Portugal
    Poultry Recipes
    Red Meat Recipes
    Restaurant Reviews
    Round-Ups
    Salad
    Salamanca
    Salsa & Guacamole
    San Diego
    Sandwiches
    Savannah
    Seafood Recipes
    Self Care
    Seville
    Side Dishes
    Sintra
    Slow Travel
    Smoothies
    Snacks
    Soups & Stews
    Spain
    St. Lucia
    Street Art
    Tea
    The Algarve
    Tomar
    Vegan
    Vegetarian
    Venice
    Vienna
    Virginia
    Warm-drinks
    Washington
    What I Ate
    Zoo

    Picture

    RSS Feed