In less than 45 minutes, you can have homemade bagels ready for cream cheese, lox, honey, nut butters, or whatever toppings your heart desires!
**This post may contain affiliate links. I receive a small amount of compensation when you purchase from my links which help to keep this blog running.**
Even though they are simple to make, homemade bagels take a little while to prepare. The yeasted dough needs to rest for a long period of time, typically overnight. After that, it is poached in boiling water and cooked in the oven.
The yeast and poaching liquid are omitted from the recipe for these gluten free bagels. Simple self-rising flour and nonfat Greek yogurt are combined to make the bagel dough, which is then rolled into rolls, coated with egg wash and any other seasonings, and baked.
The yeast and poaching liquid are omitted from the recipe for these gluten free bagels. Simple self-rising flour and nonfat Greek yogurt are combined to make the bagel dough, which is then rolled into rolls, coated with egg wash and any other seasonings, and baked.
Ingredients:
1 1/2 cups gluten free self rising flour
1 cup plain Greek yogurt (make sure it is a yogurt that is thick to avoid stickiness of dough)
1 teaspoon salt
1 large egg (for egg wash)
1 teaspoon of liquid (water, milk, or cream depending on your preference)
everything bagel seasoning mix, sesame seeds, poppy seeds, parmesan cheese, cinnamon (all optional)
Directions:
Preheat the oven to 375°F (180°C). Place parchment paper on a baking sheet.
In a large bowl, use a sturdy spatula to combine the self-rising flour, yogurt and salt.
Dump the mixture onto a lightly floured work surface. Knead the dough* together by hand for about 5 minutes, until the dough is smooth and elastic. If your dough is sticky add more flour.
If you are going to make any of the bagels flavored, (i.e. cinnamon, onion, etc.) separate half of the dough and add the flavoring. For the cinnamon bagels, I used 1 teaspoon of cinnamon to make the 2 cinnamon bagels. If you are adding toppings (parmesan cheese, everything but the bagel mix, etc.), they are added after egg wash.
If you are going to make all one flavor, divide the dough into 8 equal parts.
Shape each portion of dough into a ball. Each dough part should be formed into a ball. Make a hole in the center of each ball with your thumbs. Stretch and pull the dough slowly until it forms a ring of the same size. Continue with the subsequent rounds. You may need to flour your hands.
Arrange the shaped bagels on the prepared baking sheet. Mix together the egg wash by whisking the egg in a small bowl until smooth. Brush the egg wash mixture over the bagels. Sprinkle desired toppings over bagels.
Bake for 20 to 25 minutes, rotating the baking sheet midway through baking.
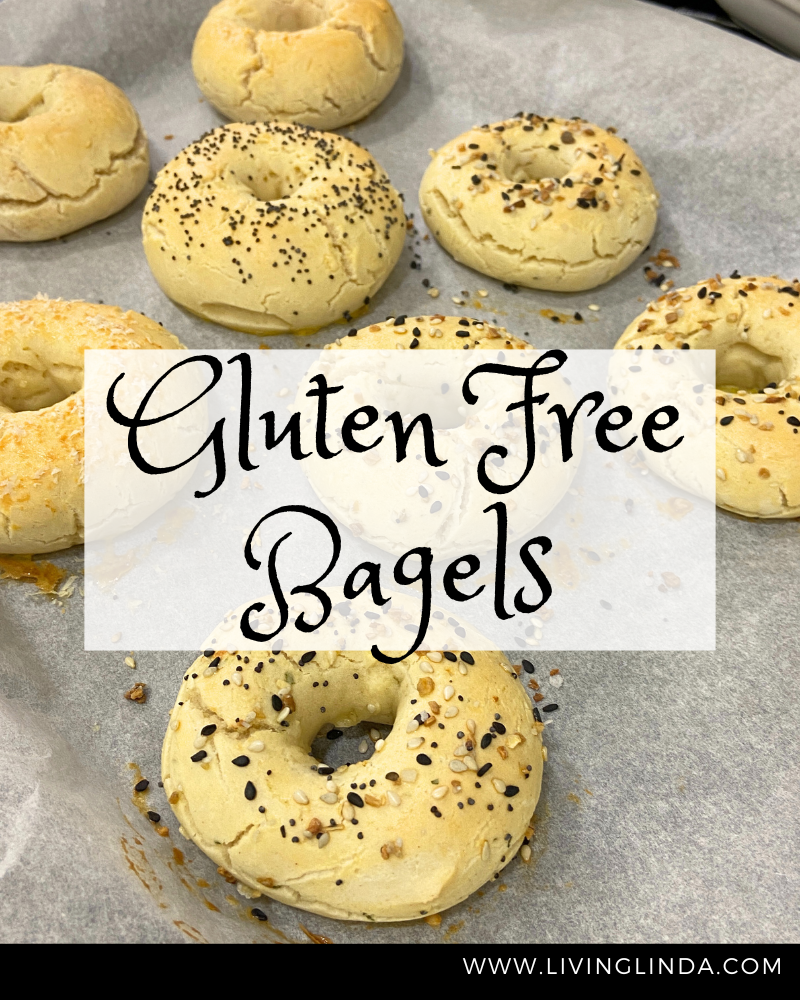
If you want the tops of the bagels more browned, increase oven temperature to 450°F. for an additional 3 to 4 minutes. (The bagels pictured were baked for 23 minutes).
Eat warm out of the oven with your favorite toppings.
*I usually have to split the dough in half to make it easier for me to knead with my small hands. It also makes it easier if you are going to make different flavors.
Preheat the oven to 375°F (180°C). Place parchment paper on a baking sheet.
In a large bowl, use a sturdy spatula to combine the self-rising flour, yogurt and salt.
Dump the mixture onto a lightly floured work surface. Knead the dough* together by hand for about 5 minutes, until the dough is smooth and elastic. If your dough is sticky add more flour.
If you are going to make any of the bagels flavored, (i.e. cinnamon, onion, etc.) separate half of the dough and add the flavoring. For the cinnamon bagels, I used 1 teaspoon of cinnamon to make the 2 cinnamon bagels. If you are adding toppings (parmesan cheese, everything but the bagel mix, etc.), they are added after egg wash.
If you are going to make all one flavor, divide the dough into 8 equal parts.
Shape each portion of dough into a ball. Each dough part should be formed into a ball. Make a hole in the center of each ball with your thumbs. Stretch and pull the dough slowly until it forms a ring of the same size. Continue with the subsequent rounds. You may need to flour your hands.
Arrange the shaped bagels on the prepared baking sheet. Mix together the egg wash by whisking the egg in a small bowl until smooth. Brush the egg wash mixture over the bagels. Sprinkle desired toppings over bagels.
Bake for 20 to 25 minutes, rotating the baking sheet midway through baking.
If you want the tops of the bagels more browned, increase oven temperature to 450°F. for an additional 3 to 4 minutes. (The bagels pictured were baked for 23 minutes).
Eat warm out of the oven with your favorite toppings.
*I usually have to split the dough in half to make it easier for me to knead with my small hands. It also makes it easier if you are going to make different flavors.
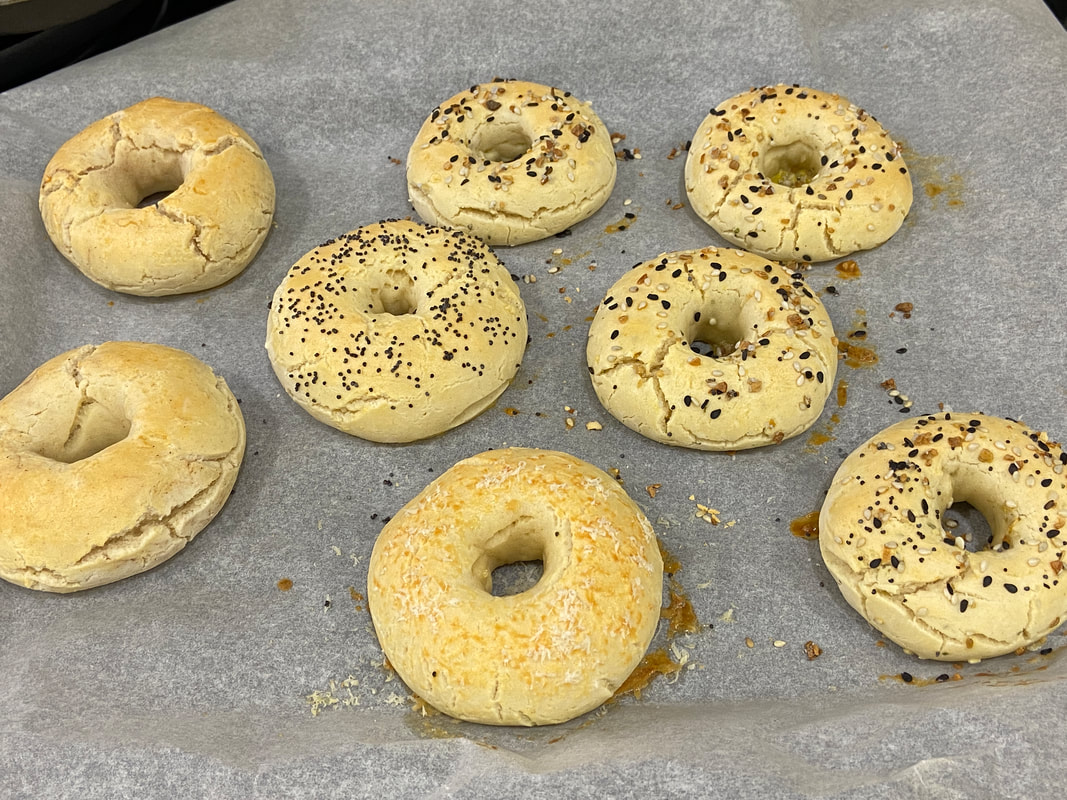
This time, I made 4 Everything Bagels, 2 Cinnamon, 1 Poppy Seed and 1 Parmesan Cheese.
STORAGE TIPS
Place in tightly sealed container or a zip-lock bag for up to 24 hours on the counter. In the refrigerator, they'll keep for up to 3 days.
If you wish to freeze them, wrap each one separately and defrost them before slicing and toasting. I usually pop them in the microwave for about 20 seconds.
Place in tightly sealed container or a zip-lock bag for up to 24 hours on the counter. In the refrigerator, they'll keep for up to 3 days.
If you wish to freeze them, wrap each one separately and defrost them before slicing and toasting. I usually pop them in the microwave for about 20 seconds.
Recommended Posts
 |

 RSS Feed