LivingLinda.com
  • Blog
  • About
    • Disclosure
    • Privacy Policy
  • Travel
    • Africa
    • Asia
    • Caribbean
    • Cruising
    • Europe
    • Latin America >
      • Costa Rica
    • North America >
      • Canada
      • United States >
        • Arizona
        • California
        • Colorado
        • Florida
        • Georgia
        • Hawaii
        • Maryland
        • Montana
        • National Parks & Monuments
        • Nevada
        • New Mexico
        • Virginia
        • Washington
        • Washington DC
  • Moving to/Living in Portugal
  • Caturday
    • Caturday 2025
    • Caturday 2024
    • Caturday 2023
    • Caturday 2022
  • Pet/House Sitting
  • Recipes
  • Shop
    • Art Gallery
    • Photography
    • Christmas Cards
    • Coloring Club Yearly Membership
    • Massage Therapy
    • Books >
      • Coloring Books
      • Cookbooks
      • National Pancake Day Sale
      • Massage >
        • Prosperous Massage Practice
  • Contact

Coconut Chia Pudding with Hemp Seeds

10/7/2025

1 Comment

 
Creamy, nutritious, and naturally delicious, coconut chia pudding with hemp seeds is the perfect make-ahead breakfast or snack. Packed with plant-based protein, omega-3s, and fiber, this simple recipe combines the tropical richness of coconut milk with the nutty crunch of hemp seeds for a satisfying treat. Best of all, it takes just minutes to prepare and can be customized with your favorite toppings—from fresh fruit to a drizzle of raspberry coulis.
Picture
**This post may contain affiliate links. I receive a small amount of compensation when you purchase from my links which help to keep this blog running.**
Coconut Chia Pudding with Hemp Seeds
(serves 2–3)

Ingredients 
  • 1 can (13.5 oz / 400 ml) full-fat coconut milk (or light if preferred)
  • 3–4 Tbsp chia seeds
  • 1–2 Tbsp hemp seeds (plus extra for topping)
  • 1–2 Tbsp maple syrup or honey (adjust to taste)
  • 1 tsp vanilla extract
  • Pinch of sea salt
Optional Toppings
  • Fresh fruit (berries, mango, banana slices, kiwi)
  • Coconut flakes
  • Granola
  • Extra hemp seeds or chopped nuts
Picture
Instructions

Mix the base: In a medium bowl or jar, whisk together coconut milk, chia seeds, hemp seeds, maple syrup, vanilla, and salt until well combined.

Rest & stir: Let the mixture sit for about 10 minutes, then stir again to prevent clumping.

Chill: Cover and refrigerate for at least 2–4 hours (overnight is best) until the pudding thickens.

Serve: Stir before serving, spoon into bowls or jars, and top with your favorite fruits, nuts, or coconut flakes.
Tips:
For extra creaminess, blend the mixture before chilling.
If the pudding is too thick, stir in a splash of almond milk or more coconut milk.
To meal prep, portion into small jars and store in the fridge for up to 4–5 days. 
You can also freeze individual portions and then just take out of freezer and put in refrigerator the night before.

Picture
Recommended Posts
Picture
1 Comment

​Over-Medium Egg Over Crispy Hash Browns with Veggies & Portobello

4/11/2025

0 Comments

 
​Enjoy a savory brunch with this easy recipe for crispy hash browns topped with a perfectly cooked over-medium egg and sautéed portobello mushrooms. A delicious, wholesome breakfast idea!
Picture
**This post may contain affiliate links. I receive a small amount of compensation when you purchase from my links which help to keep this blog running.**
There’s something special about a beautifully cooked egg—especially when it’s nestled on top of golden, crispy hash browns and sautéed veggies, all resting on a hearty portobello mushroom cap. This brunch dish is proof that comfort food can be both elegant and nourishing.

The beauty of this plate lies in its simplicity—perfectly seasoned potatoes, earthy mushrooms, a hint of pesto or herb sauce, and that dreamy over-medium egg with a slightly runny yolk that ties everything together. Add a glass of fresh orange juice and citrus on the side, and you've got yourself a brunch that feels like a weekend celebration any day of the week.

Whether you're serving it up for a special occasion or just treating yourself, this savory stack is sure to impress.
Over-Medium Egg Over Crispy Hash Browns & Portobello
Serves: 2
Prep Time: 15 minutes
Cook Time: 25 minutes
Total Time: 40 minutes


Ingredients:
  • 2 large eggs
  • 2 medium potatoes, peeled and diced small
  • 2 large portobello mushroom caps, cleaned and stems removed
  • 1 tablespoon olive oil (plus more for cooking)
  • 2 tablespoons finely chopped onion
  • 1 garlic clove, minced
  • 1/4 teaspoon paprika
  • Salt & freshly ground black pepper, to taste
  • 2 teaspoons chopped fresh parsley or basil
  • 2 tablespoons pesto or chimichurri (optional but recommended)
  • Optional sides: orange slices, strawberries fresh greens, juice
Picture
Instructions:
  1. Prep the Potatoes:
    Bring a pot of water to a boil. Add diced potatoes and cook for 5 minutes to parboil. Drain and pat dry with a clean towel.
  2. Crisp the Hash Browns:
    In a skillet, heat 1 tablespoon olive oil over medium heat. Add potatoes, spreading them into a single layer. Season with paprika, salt, and pepper. Cook for 10-12 minutes, flipping occasionally, until golden and crisp. Stir in onion and garlic during the last 3-4 minutes of cooking. Toss in chopped parsley or basil and remove from heat.
  3. Sauté the Portobellos:
    While potatoes cook, heat a separate pan with a bit of oil. Sear the mushroom caps gill-side down for 3-4 minutes, flip, and cook another 3 minutes until tender. Season with salt and pepper. Optionally, brush with pesto or chimichurri.
  4. Cook the Eggs (Over-Medium):
    In a nonstick skillet, heat a small amount of oil or butter over medium heat. Crack in the eggs and let them cook undisturbed until the whites are mostly set, about 2 minutes. Flip gently and cook another 1-2 minutes until yolks are just beginning to firm but still soft and jammy.
  5. Assemble:
    Place each portobello cap on a plate. Top with a generous scoop of hash browns. Gently place the over-medium egg on top. Finish with a crack of black pepper and a drizzle of herb sauce if using.
  6. Serve:
    Pair with a glass of orange juice, fresh fruit slices, or a simple side salad for the full brunch experience.
Picture
Picture
Tips & Variations:
​Swap potatoes with sweet potatoes for a sweeter, more nutrient-dense option.

Add spinach or kale for an extra green boost.

Want to go spicy? Sprinkle with chili flakes or a dash of hot sauce.
Picture
Recommended Posts
Picture
Picture
Picture
Picture
0 Comments

Sour Cream Pancakes with Cherry, Mango and Pineapple Compote

7/5/2024

0 Comments

 
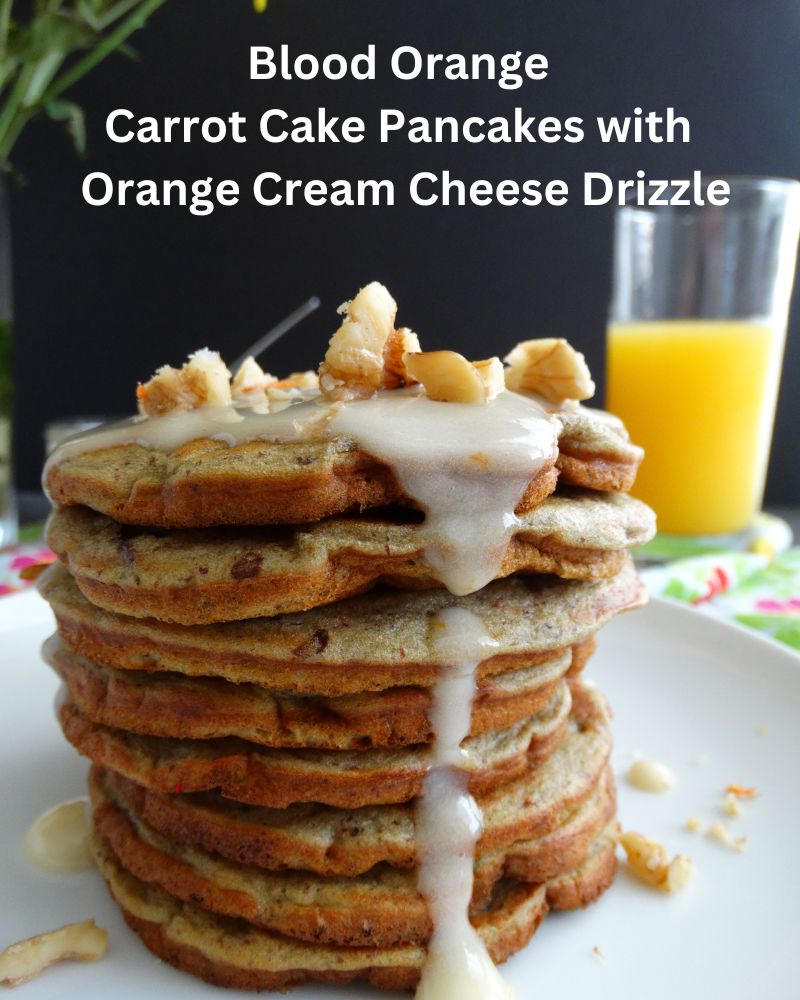
Today's pancake adventure had a tropical feel. Sour cream pancakes with cherry, mango and pineapple compote with dulce de leche, crème fraîche whipped cream, pecans and toasted coconut.
Picture
**This post may contain affiliate links. I receive a small amount of compensation when you purchase from my links which help to keep this blog running.**
Picture
Gluten-Free Sour Cream Pancakes

Ingredients:
1 cup gluten-free flour blend (ensure it includes xanthan gum for better texture)
1 tablespoon sugar
1 teaspoon baking powder
1/2 teaspoon baking soda
1/4 teaspoon salt
1 cup sour cream
2 large eggs
1/4 cup milk (dairy or non-dairy)
1 teaspoon vanilla extract
Butter or oil for cooking pancakes

Instructions:
In a large bowl, whisk together the gluten-free flour, sugar, baking powder, baking soda, and salt.

Looking for more breakfast ideas?  Check out my Perfect Pancakes Cookbook.
Picture
In another bowl, whisk together the sour cream, eggs, milk, and vanilla extract until smooth.
Pour the wet ingredients into the dry ingredients and stir until just combined. The batter should be thick and slightly lumpy.

Heat a griddle or non-stick skillet over medium heat. Add a small amount of butter or oil.
Pour about 1/4 cup of batter onto the griddle for each pancake. Cook until bubbles form on the surface and the edges look set, then flip and cook until golden brown on the other side. Repeat with the remaining batter, adding more butter or oil to the griddle as needed.
Cherry, Mango, and Pineapple Compote

Ingredients:
1 cup fresh or frozen cherries, pitted and halved
1 cup fresh mango, diced
1 cup fresh pineapple, diced
2 tablespoons sugar
Juice of 1/2 lemon
Zest of 1/2 lemon

Instructions:
In a saucepan, combine the cherries, mango, pineapple, sugar, lemon juice, and lemon zest.
Cook over medium heat, stirring occasionally, until the fruits are softened and the mixture has thickened slightly, about 8-10 minutes.
Remove from heat and let cool slightly before serving.
Picture
​Dulce de Leche

Use store-bought dulce de leche or make your own by simmering sweetened condensed milk until caramelized.
Crème Fraîche Whipped Cream

Ingredients:
1 cup heavy cream
2 tablespoons crème fraîche
2 tablespoons powdered sugar
1/2 teaspoon vanilla extract

Instructions:
In a chilled mixing bowl, whip the heavy cream until soft peaks form.
Add the crème fraîche, powdered sugar, and vanilla extract. Continue whipping until stiff peaks form. Be careful not to overmix.
Picture
​Toasted Pecans and Coconut

Ingredients:
1/2 cup pecans, chopped
1/2 cup shredded coconut

Instructions:
In a dry skillet over medium heat, toast the pecans until fragrant and lightly browned, about 3-4 minutes. Stir frequently to prevent burning. Remove from skillet and set aside.
In the same skillet, toast the shredded coconut until lightly golden, about 2-3 minutes, stirring frequently. Remove from heat and set aside.
Picture
Assembly:
  1. Place a stack of gluten-free sour cream pancakes on a plate.
  2. Spoon the cherry, mango, and pineapple compote over the pancakes.
  3. Drizzle with dulce de leche.
  4. Top with a generous dollop of crème fraîche whipped cream.
  5. Sprinkle with toasted pecans and coconut.
​Enjoy your decadent gluten-free sour cream pancakes with cherry, mango, and pineapple compote, topped with dulce de leche, crème fraîche whipped cream, pecans, and toasted coconut!
Recommended Posts
Picture
Picture
Picture
0 Comments

Healthy Gluten Free Almond and Orange French Toast

3/24/2024

0 Comments

 
This quick and easy French toast is made with healthier swaps but still packed with flavor, you won't even miss the heavy cream and butter.  Ready in about 15 minutes, it's the perfect sweet breakfast recipe for birthdays, holidays such as Mother’s Day or Christmas, busy mornings, or just an easy Sunday morning, 
Picture
**This post may contain affiliate links. I receive a small amount of compensation when you purchase from my links which help to keep this blog running.**
Healthy Gluten Free Almond and Orange French Toast
Yields 4 servings

Ingredients:
8 slices thick slices of gluten free bread (perferrably slightly stale)
4 eggs, room temperature
1 cup unsweetened almond milk
​1 tsp almond extract
1 tsp ground cinnamon
¼ tsp ground nutmeg
zest of 1 orange
1 Tbsp maple syrup or honey
2 tsp coconut oil


Optional Toppings:
Fresh berries
orange or mandarin
Monkfruit Maple syrup or Honey
​Monkfruit powdered sugar
whipped cream or Greek yogurt
Slivered almonds
Directions:

Whisk all ingredients from eggs to maple syrup/honey in a medium mixing bowl until well combined. Pour the egg mixture into a flat, shallow dish.

Place 4 slices of bread into the egg mixture and allow to soak for 2 minutes before turning over and soaking again for another 1 minute.

While the bread is soaking, melt 1 tsp of coconut oil in a large skillet over a medium or medium low heat to avoid burning.

Remove the bread from the egg mixture and cook two to three minutes on each side until golden brown. Repeat with 3 bread slices.

Then repeat: melt 1 tsp coconut oil in a large skillet again, and use that to cook the remaining 4 bread slices.

Serve with berries, toasted almonds, whipped cream, mint, and maple syrup or your favorite toppings!
Picture
Picture
Vegan Option:  To make this heart healthy french toast vegan, use a flax egg and a little bit of cornstarch instead of the regular eggs. Also be sure to use maple syrup and not honey for the sweetener.
Sugar Free Option: Making sugar free or low sugar french toast is super easy! All you have to do is substitute the maple syrup for a sugar free maple syrup (I like the Lakanto Monkfruit Maple Syrup), and make sure to use sugar free toppings. For a low sugar version, use half the amount of maple syrup.
Storing Leftovers
To Store In The Fridge: Let the leftovers cool completely. Transfer the toast to an airtight storage container. Store in the fridge for up to 4 days. Reheat in the toaster oven or on a warm skillet until heated through.

To Freeze: To freeze this recipe, transfer the cooked french toast to a freezer safe airtight container or freezer bag and separate the individual slices using parchment paper. Place in the freezer for up to three to four months. Defrost in the fridge overnight, and then heat the frozen french toast slices on a skillet on the stovetop or in the oven until warmed through.
Recommended Posts
Picture
0 Comments

Individual Keto Breakfast Tart Crusts

8/28/2023

0 Comments

 
These Keto Breakfast Tart Crusts are a delicious and make the perfect vessel for yogurts, fruits or whatever you want to put in them.
Picture
**This post may contain affiliate links. I receive a small amount of compensation when you purchase from my links which help to keep this blog running.**
Individual Keto Breakfast Tart Crusts
Yields 4 tarts

Prep Time 5 minutes
Cook Time 10-15 minutes

Ingredients:
2 1/2 cup Almond Flour
1/2 cup shredded coconut
​1/4 cup gluten free oats
1 Tablespoon Chia seeds
2 teaspoons hemp seeds
1/3 cup Keto sweetener of choice 
1/4 teaspoon Sea salt 
1/4 cup Ghee (measured solid, then melted)
1 large Egg 
1/2 teaspoon Vanilla extract (optional)
¼ teaspoon cinnamon
Directions: Preheat the oven to 350°F (180°C). Grease 4 mini tart pans.

In a large bowl, mix together the seven ingredients. Stir in the melted ghee and egg, until well combined. (If using vanilla, stir that into the melted ghee before adding to the dry ingredients.)

The "dough" will be dry and crumbly. Just keep mixing, pressing and stirring, until it's uniform. (Alternatively, you can use a food processor to mix everything together.)


Divide the granola crust evenly between the four prepared tart pans and use a flat-bottomed measuring cup or glass to press the crust evenly along the bottom and up the sides of the pans.

Place on a baking sheet and bake for 10-15 minutes, or until firm to the touch and browned.
Carefully poke holes in the surface using a fork to prevent bubbling.

Let cool completely.
Here's how I served them.
Picture
Picture
Picture
Recommended Posts
Picture
Picture
Picture
0 Comments
<<Previous

    Linda Roisum

    Traveller, chief taste-tester and food finder and retired expat living in Lisbon, Portugal.

    Archives

    November 2025
    October 2025
    September 2025
    August 2025
    July 2025
    June 2025
    May 2025
    April 2025
    March 2025
    February 2025
    January 2025
    December 2024
    November 2024
    October 2024
    September 2024
    August 2024
    July 2024
    June 2024
    May 2024
    April 2024
    March 2024
    February 2024
    January 2024
    December 2023
    November 2023
    October 2023
    September 2023
    August 2023
    July 2023
    June 2023
    May 2023
    April 2023
    March 2023
    February 2023
    January 2023
    December 2022
    November 2022
    October 2022
    September 2022
    August 2022
    July 2022
    June 2022
    May 2022
    April 2022
    March 2022
    February 2022
    December 2021
    November 2021
    September 2021
    May 2021
    September 2020
    April 2020
    March 2020
    February 2020
    January 2020
    November 2019
    February 2019
    November 2018
    July 2018
    April 2018
    December 2017
    May 2017
    April 2017
    December 2016
    April 2016
    March 2016
    February 2016
    December 2015
    November 2015
    October 2015
    September 2015
    August 2015
    April 2015
    January 2015
    July 2014
    June 2014
    March 2014
    February 2013
    December 2012
    November 2012
    September 2012
    May 2012
    May 2011
    April 2011
    December 2010
    September 2010
    July 2010
    March 2010
    August 2009
    June 2008

    Categories

    All
    30 Minute Meals
    AirBnb Reviews
    Alaska
    Alicante
    Appetizer Recipes
    Aquariums
    Arizona
    Art
    Art Spotlight
    Austria
    Aveiro
    Barcelona
    Book Reviews
    Braga
    Breakfast Recipes
    Bright Line Eating
    Brighton
    Burgers
    Caldas Da Rainha
    California
    Canada
    Candy
    Caribbean
    Chocolate
    Christmas
    Coimbra
    Colorado
    Condiments
    Cookies
    Cooking For Two
    Costa Rica
    Cost Of Living
    Crock Pot Recipes
    Cruises
    D.C.
    Denali National Park
    Dessert Recipes
    Dips
    Dominica
    Dressings
    Drinks
    Dublin
    England
    Florida
    France
    Freebies
    Georgia
    Germany
    Gluten Free Dining
    Grand Cayman
    Hawaii
    Health
    Hiking
    Holidays
    Hong Kong
    Hysterectomy
    Interviews
    Ireland
    Italy
    Juices
    Keto Recipes
    Las Vegas
    Lisbon
    Living Abroad
    London
    Madeira Island
    Madrid
    Main Courses
    Mains
    Malaga
    Marrakech
    Maryland
    Menopause
    Monthly Recap
    Morocco
    Moving To Portugal
    MSC Orchestra
    Museums
    Naples
    National Parks
    Nevada
    New Mexico
    Night Sweats
    North Carolina
    Ocean City
    One Pot Meals
    Paris
    Pies
    Portugal
    Poultry Recipes
    Red Meat Recipes
    Restaurant Reviews
    Round-Ups
    Salad
    Salamanca
    Salsa & Guacamole
    San Diego
    Sandwiches
    Savannah
    Seafood Recipes
    Self Care
    Seville
    Side Dishes
    Sintra
    Slow Travel
    Smoothies
    Snacks
    Soups & Stews
    Spain
    St. Lucia
    Street Art
    Tea
    The Algarve
    Tomar
    Vegan
    Vegetarian
    Venice
    Vienna
    Virginia
    Warm-drinks
    Washington
    What I Ate
    Zoo

    Picture

    RSS Feed